OpenId and CryptnDrive
Introduction
The authentication of CryptnDrive can be provided by an openId server. The server has to be configured. As for other third party authentication, the private key of users is then protected by a specific passphrase which is asked at the first connexion.
Configuring a LemonLdap openId server
All authentications are simple in the principle and fairly complex in the details. This is also the case for openId. Especially, you have to configure 2 systems in a compatible way : the configuration of the openId server must match the configuration of the CryptnDrive application.
That said, LemonLdap is a gentle application that honestly tries to help you. Let's jump into it.
In our example, LemondLdap and CryptnDrive are set up on the same server. I suppose that you have setup LemonLdap and that you have an administrator access to it. If you use the default lemonldap debian package, without any configuration, it corresponds to the user "dwho".
Lemonldap is configured with many web virtual hosts : api (manager-api.example.com), handler (reload.example.com), manager (manager.example.com), portal (auth.example.com).
OpenId Connect must be allowed in LemonLdap :
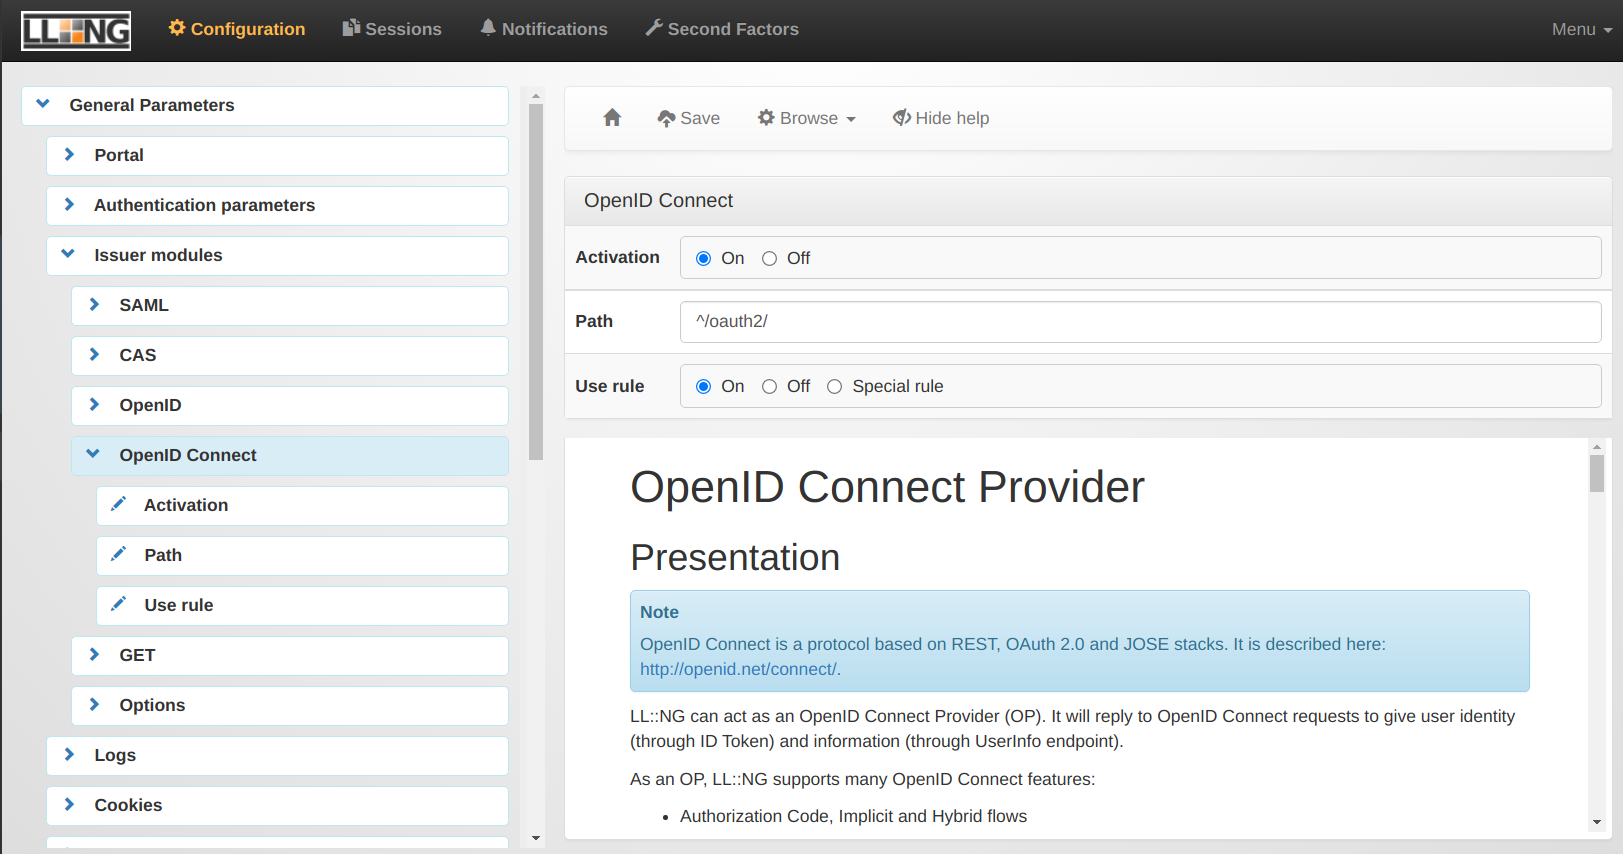
This is done in the "General Parameters" > "Issuer modules" > "OpenID Connect" .
Then, the application CryptnDrive must be configured in the configuration.
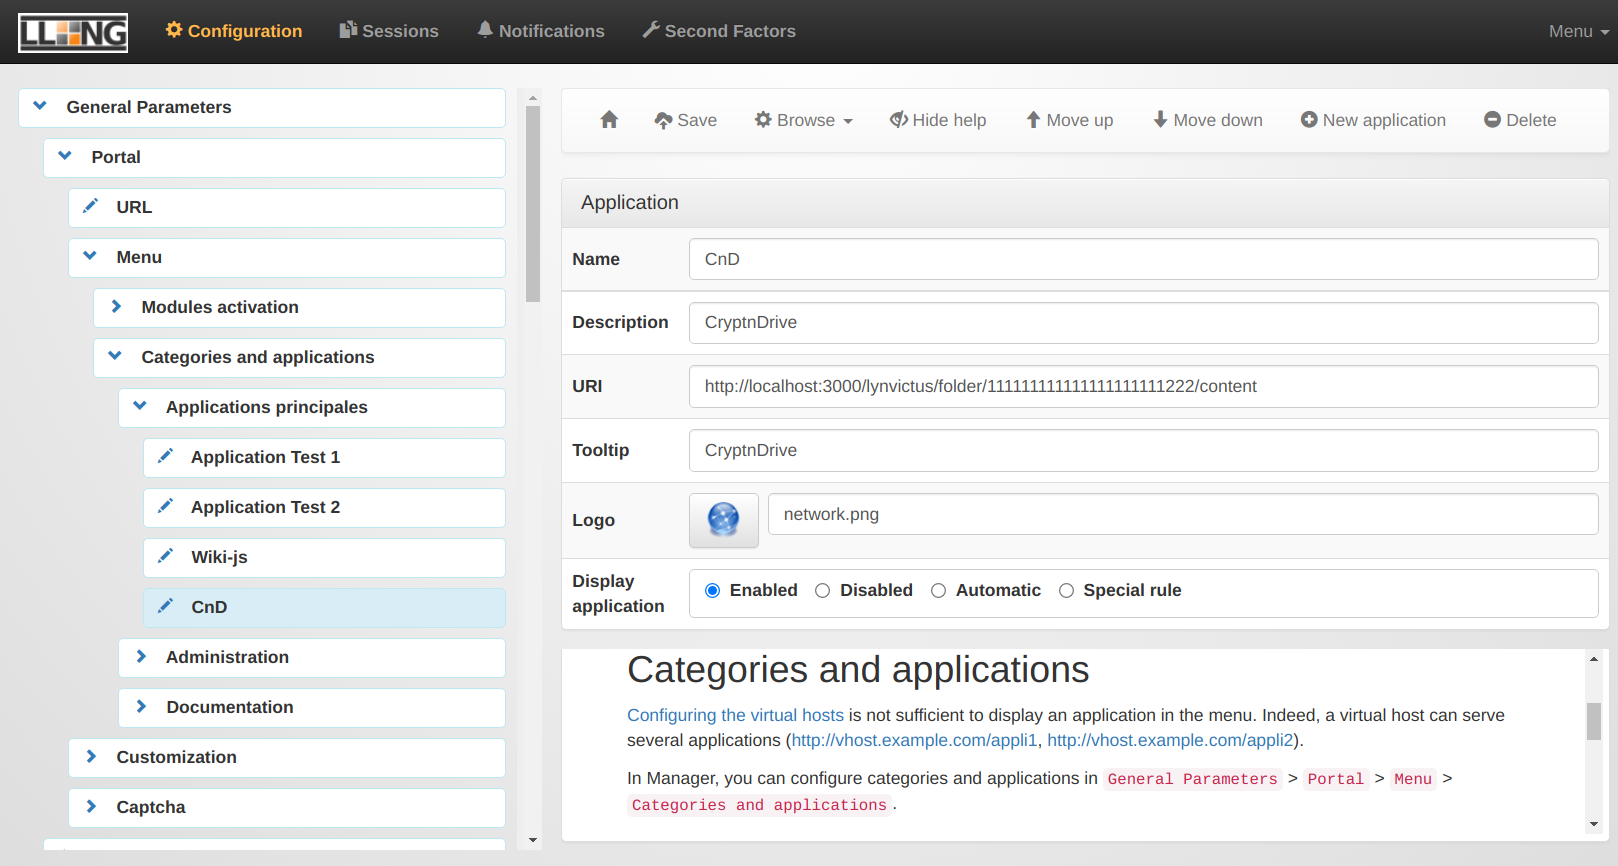
You will find these parameters in "General Parameters" > "Portal" > "Menu" > "Categories and applications" > "A given category - whatever you want". You must create a "New application".
You will be able to choose the name for the application, give a description, add an URI, a tooltip, choose a logo and enabled to display the application.
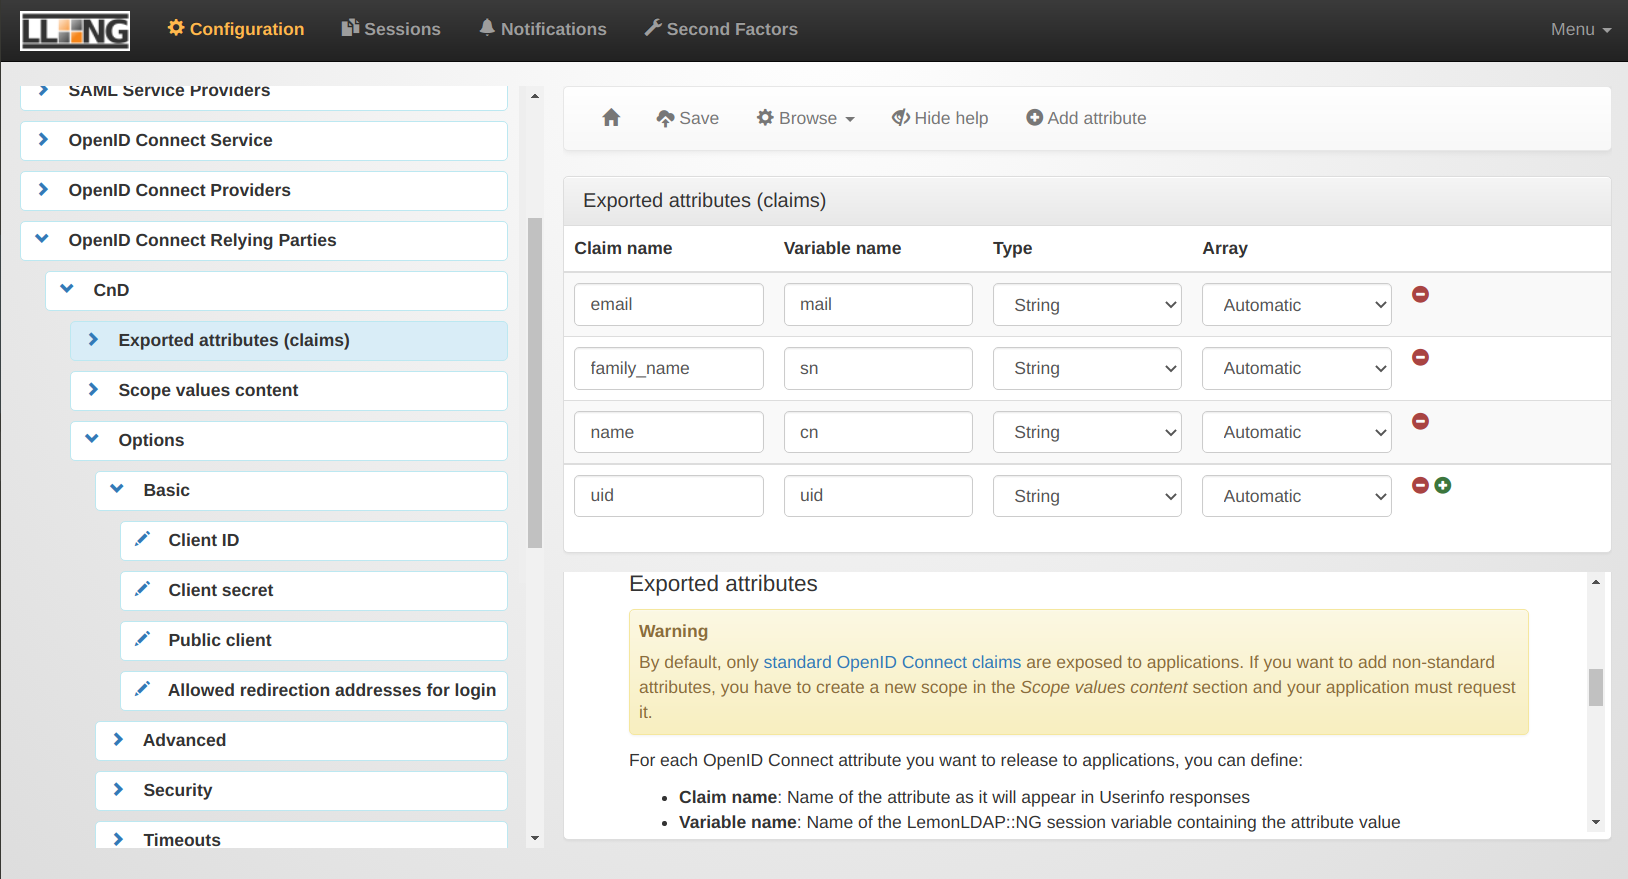
Once this is done, we have to configure the informations that are provided by LemonLdap to the CryptnDrive application.
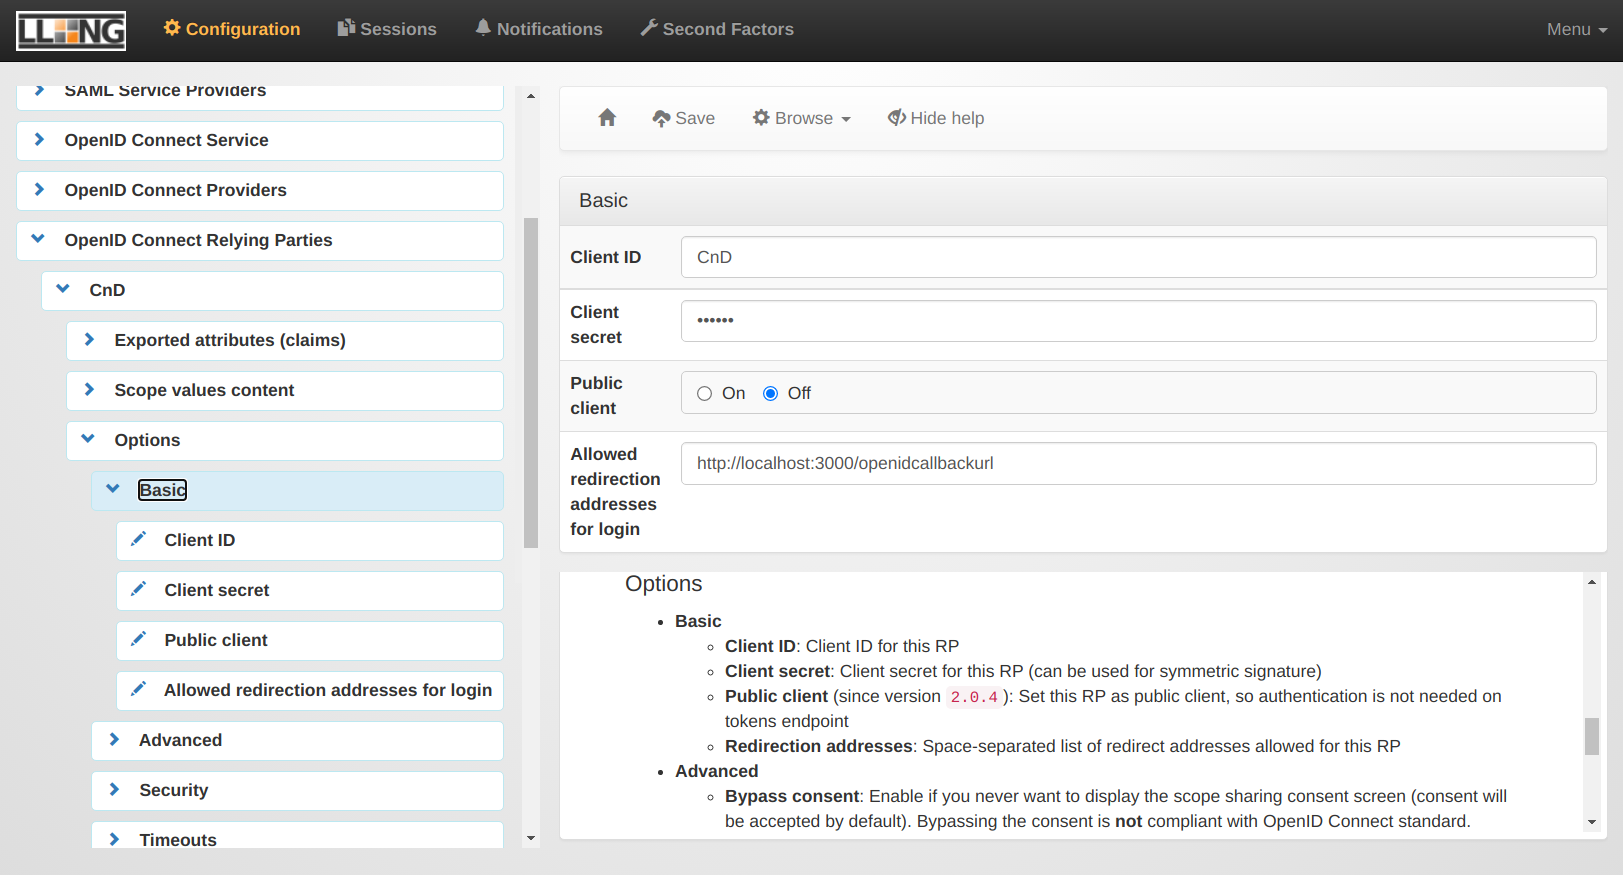
Then, the way the OpenId server is communicating with the CryptnDrive application, and especially the callback url on the CryptnDrive server.
Configuring CryptnDrive
A new authentication schema must be provided to CryptnDrive. So in the Configuration, in the Authentications section, a new authentication must be added of type OpenID. This authentication must be enabled.
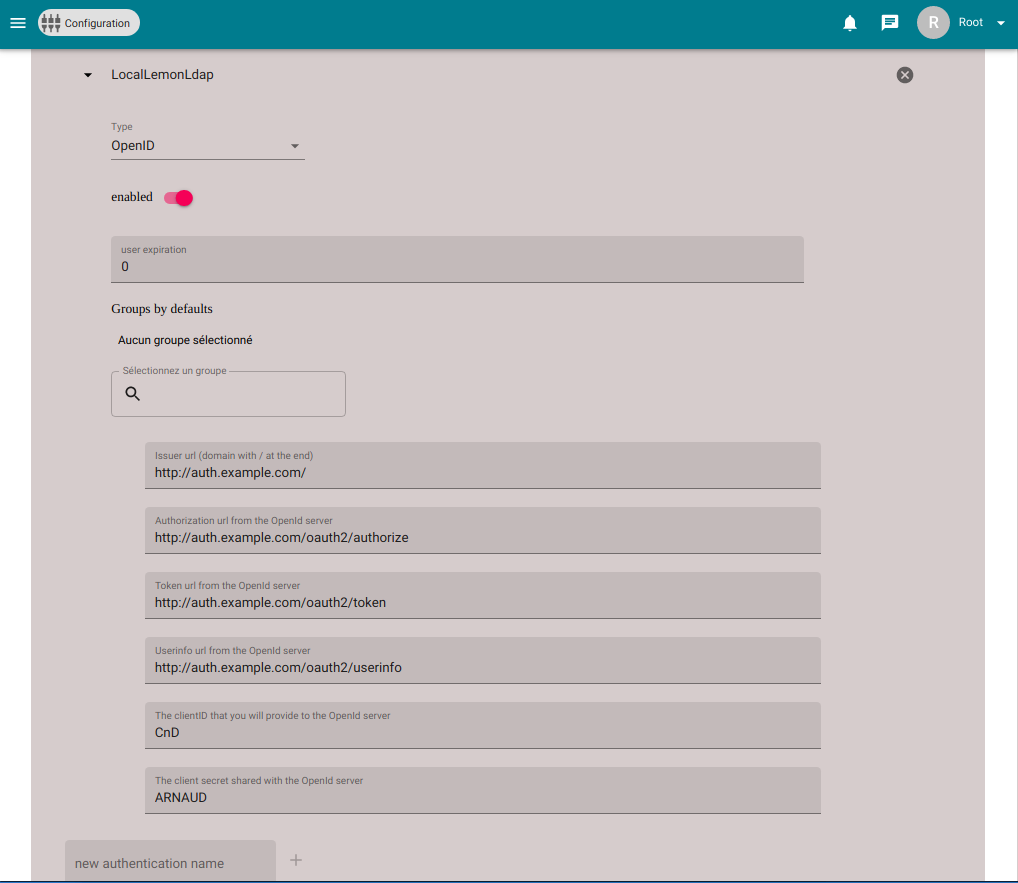
The other parameters to set up are the following :
- Issuer url (domain with / at the end): http://auth.example.com/
- Authorization url from the OpenId server : http://auth.example.com/oauth2/authorize
- Token url from the OpenId server : http://auth.example.com/oauth2/token
- Userinfo url from the OpenId server : http://auth.example.com/oauth2/userinfo
- The clientID that you will provide to the OpenId server : CnD
- The client secret shared with the OpenId server : A shared secret
When the user logs out, the user is redirected to the issuer url.